


How Do You Measure Cycle Frame Size? Step-by-Step Guide for Perfect Bike Fit
Knowing how to measure cycle frame size is key for a comfortable ride on a road, mountain, or electric bike. Sizes vary between manufacturers, so understanding key measurements helps you choose the right fit. This guide shows you how to measure your bike frame step by step for accurate sizing.
Essential Bike Frame Measurements
Before measuring your bike, it’s important to understand the key frame dimensions that determine fit, comfort, and handling:
-
Top tube length: The horizontal distance from the centre of the head tube to the centre of the seatpost. This affects your reach and overall cockpit length.
-
Seat tube length: Distance from the centre of the bottom bracket to the top of the seat tube. It determines saddle height range and overall frame size.
-
Reach: Horizontal distance from the bottom bracket to the top of the head tube. A crucial measurement for ensuring proper riding posture.
-
Stack: Vertical distance from the bottom bracket to the top of the head tube. Helps evaluate how upright or stretched your riding position will be.
-
Wheelbase: Distance between the front and rear axles. Influences stability and handling characteristics of the bike.
-
Chainstay length: Distance from the bottom bracket to the rear dropout. Shorter chainstays make the bike more agile, while longer ones improve stability.
-
Front centre: Distance from the bottom bracket to the front axle. Affects handling and clearance between pedals and front wheel.
-
Seat tube angle: Angle of the seat tube relative to the ground. Determines saddle positioning over the pedals and pedalling efficiency.
-
Head tube angle: Angle of the head tube relative to the ground. Influences steering responsiveness and overall handling.
-
Bottom bracket drop: Difference between the wheel axle height and the crank axle. Affects bike stability and cornering.
-
Bottom bracket height: Distance from the ground to the centre of the bottom bracket. Impacts ground clearance and pedalling position.
Tools You’ll Need to Measure a Bike Frame
To measure a bike frame accurately, you’ll need a few essential tools:
-
Tape measure: For measuring lengths like top tube, seat tube, and chainstay.
-
Clinometer or smartphone angle app: Helps measure angles such as seat tube and head tube angles.
-
Long spirit level or straight edge: Ensures horizontal and vertical measurements are precise, especially for top tube and reach.
-
Plumb line (or string with a small weight like Blu Tack): Useful for measuring reach, stack, and ensuring alignment.
How to Measure Cycle Frame Size – Step-by-Step Guide
Measuring your bike frame correctly is essential for comfort, efficiency, and proper handling on road bikes, mountain bikes, and electric bikes. Follow this step-by-step guide to get accurate frame measurements and ensure the perfect fit.
Step 1: Measure Top Tube Length
The top tube length determines how far you reach forward to the handlebars. Modern bikes often have sloped top tubes, so the effective or virtual top tube is the horizontal measurement from the head tube to the seatpost.
How to Measure:
-
Stand the bike upright on a level surface.
-
Use a spirit level or straight edge to ensure horizontal alignment.
-
Measure from the centre of the head tube to the centre of the seatpost.
Step 2: Measure Seat Tube Length
The seat tube length affects saddle height and overall frame size. Some bikes use a “virtual” measurement to account for sloped top tubes or compact frames.
How to Measure:
-
Measure from the centre of the bottom bracket to the top of the seat tube or collar.
-
For kinked or curved tubes, follow a straight line rather than the tube itself.
Step 3: Measure Reach and Stack
Reach is the horizontal distance from the bottom bracket to the top of the head tube, and stack is the vertical distance. These measurements are key for handlebar positioning, comfort, and riding posture.
How to Measure:
-
Place a spirit level across the top of the head tube with a plumb line attached.
-
Measure horizontally from the bottom bracket to the plumb line for reach.
-
Measure vertically from the bottom bracket to the top of the head tube for stack.
-
Repeat to ensure accuracy.
Step 4: Measure Wheelbase
The wheelbase is the distance between the front and rear axles and plays a key role in a bike’s stability, handling, and ride feel. A longer wheelbase generally improves stability at high speeds, while a shorter wheelbase makes the bike more agile and responsive.
How to Measure:
-
Ensure the fork is aligned straight ahead.
-
Measure the distance along the ground between the centre of the front axle and the centre of the rear axle.
-
For added accuracy, measure both sides of the bike and calculate the average to account for any slight misalignment.
Step 5: Measure Chainstay Length
Chainstay length is the straight-line distance from the bottom bracket to the rear dropout. It affects the bike’s handling: shorter chainstays make the bike feel more responsive and agile, while longer chainstays improve stability and straight-line tracking.
How to Measure:
-
Measure in a straight line from the centre of the bottom bracket to the centre of the rear dropout.
-
Avoid following the curve of the tube for an accurate measurement.
Step 6: Measure Front Centre
The front centre is the distance from the bottom bracket to the front axle. It influences steering, balance, and pedal clearance, playing a key role in overall bike handling and ride comfort.
How to Measure:
-
Measure in a straight line from the centre of the bottom bracket to the centre of the front axle.
-
Ensure the fork is aligned straight to avoid errors caused by misalignment.
Step 7: Measure Seat Tube and Head Tube Angles
The seat tube and head tube angles are crucial for riding posture, pedalling efficiency, and handling. A steeper seat tube angle positions the saddle further forward over the pedals, while the head tube angle affects steering responsiveness and stability.
How to Measure:
-
Use a clinometer or a smartphone angle app.
-
Seat tube angle: Measure from the bottom bracket along the centreline to the top of the seat tube.
-
Head tube angle: Measure along the centreline of the head tube or fork legs.
-
Ensure the bike is perfectly vertical for accurate readings.
Step 8: Measure Bottom Bracket Drop and Height
Bottom bracket drop and height affect stability, cornering, and pedalling efficiency. The drop is the vertical difference between the wheel axles and the bottom bracket, while height is the distance from the ground to the bottom bracket centre.
How to Measure:
-
Drop: Subtract the bottom bracket height from the wheel axle height.
-
Height: Measure vertically from the ground to the bottom bracket centre.
-
Make sure tyres are inflated to normal riding pressure for accuracy.
Final Tips for Measuring Cycle Frame Size
Always refer to the manufacturer’s geometry chart when available, as it provides the most accurate guidance for choosing the right frame. Repeat your measurements to ensure precision, and stick to metric units for consistency across different bike models.
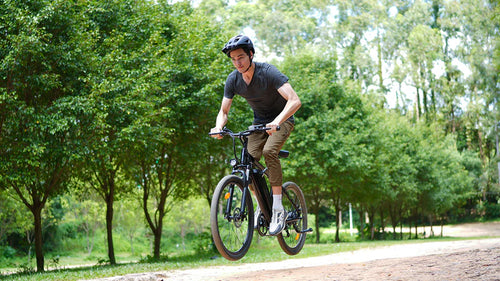
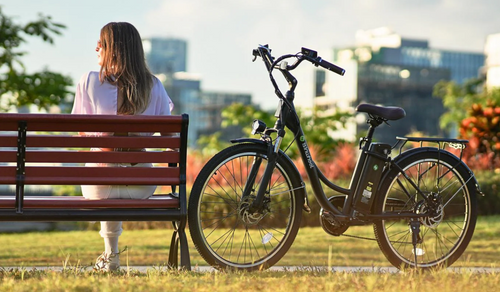
Properly measuring your bike frame is important for all types of bikes, including road bikes, mountain bikes, hybrids, and electric bikes. Understanding these measurements helps you select a bike that fits comfortably, improves performance, and provides a safer, more enjoyable riding experience.
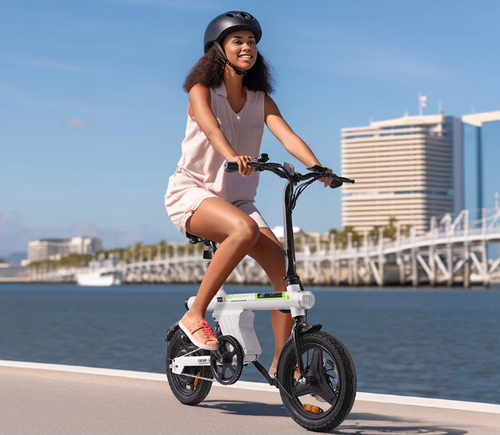
isinwheel U2 Electric Bike – Ideal Frame Size for Comfort and Performance

Looking for an electric bike that fits perfectly? The isinwheel U2 is an excellent example of how to choose the right cycle frame size for comfort, stability, and optimal riding performance. Designed for riders between 5’3" and 6’3" (160–192 cm), this e-bike combines precise geometry with adjustable features, making it ideal for city commuting, leisure rides, or mixed terrain adventures. Understanding its key frame measurements can help you see how proper sizing improves posture, handling, and overall cycling efficiency.
Key Frame Specifications:
-
Top Tube Length: 17.3″ – affects reach and handlebar positioning
-
Reach: 16.54″ – determines riding posture and comfort
-
Standover Height: 17.7″ – ensures easy mounting and dismounting
-
Wheelbase: 43.7″ – impacts ride stability
Why Choose the U2:
These key measurements make it easier to evaluate fit using the methods in this guide on how to measure cycle frame size. Its geometry and adjustable saddle and handlebars provide a comfortable, well-balanced ride for most adult riders.
Conclusion
Knowing how to measure cycle frame size ensures a perfect bike fit, better comfort, and safer riding. Key measurements like top tube, seat tube, reach, and wheelbase help you choose the right frame. Using examples like the isinwheel U2 electric bike demonstrates how proper sizing improves posture, handling, and overall ride performance.
FAQs
How do I know what frame size my bike is?
To find your bike’s frame size, measure the seat tube from the centre of the bottom bracket to the top of the seat tube, and the top tube horizontally from the head tube to the seatpost. You can also refer to the manufacturer’s geometry chart for your model. These measurements help ensure the frame fits your height, leg length, and riding style.
What size is a 57 cm bike frame?
A 57 cm frame usually fits riders between 5’9″ and 6’0″ (175–183 cm). This measurement generally refers to the seat tube, but you should also check the top tube length and reach to ensure a comfortable fit.
What does a 26‑inch bike frame mean?
A 26-inch bike frame usually refers to the wheel size, not the frame itself. Bikes with 26-inch wheels are common on older mountain bikes and some hybrid bikes, affecting handling, stability, and tyre compatibility.
What does 27.5 mean on a bike?
27.5-inch wheels, also called 650B, provide a balance between rollover capability and agility. They are popular on modern mountain bikes because they smooth out rough terrain while remaining more manoeuvrable than 29-inch wheels.
The Latest Posts


Explore isinwheel products
City E Scooter | Off-Road Scooter
Fastest Scooter | Kids Scooters


Leave a comment