


How to Change a Bike Tyre – Complete Step-by-Step Guide
Knowing how to change a bike tyre is essential for every cyclist, including e-bike riders. Whether you use road, mountain, tubeless, or clincher tyres, proper maintenance improves safety, performance, and saves money. This guide provides simple steps to remove and fit your bike tyres quickly and correctly, keeping both bikes and e-bikes in top condition.
Importance of Maintaining Bike Tyres
Regular maintenance of bike tyres is essential for safety and performance. Inspect your tyres often for tread wear, sidewall cuts, cracks, or embedded debris to prevent punctures and accidents. Properly cared-for tyres provide better grip, smoother rides, and improved braking—benefits that apply to both standard bikes and e-bikes.
Checking tyre pressure before every ride is another crucial step in tyre maintenance. Learning how to change a bike tyre ensures you’re prepared for flats or worn tyres, keeping your bike safe and reliable on any road or trail.
Step-by-Step Guide: How to Change a Bike Tyre
Step 1 – How to Remove a Bike Tyre
Start by fully deflating the tyre through the valve. Push the tyre bead into the rim’s central channel to create slack, making it easier to remove.
Use your hands or a tyre lever to unhook the tyre bead from the rim and remove the inner tube completely. Inspect the rim and rim tape for damage to prevent future punctures or tyre problems.
Step 2 – Install the First Tyre Bead
If using folding tyres, shape them into a round form before installation. Place one side of the tyre onto the rim using your hands for a smooth fit.
Check the directional arrows on the tyre for correct rotation and position the tyre label above the valve as a reference. Correct first-bead installation ensures easier fitting of the second bead.
Step 3 – Install the Inner Tube or Tubeless Valve
Slightly inflate the inner tube to give it shape and avoid pinching under the tyre bead. For latex tubes, apply a light dusting of talcum powder to prevent sticking to the tyre or rim.
For tubeless tyres, insert the valve and secure the retaining nut. Proper installation helps maintain tyre pressure and prevents leaks.
Step 4 – Install the Second Tyre Bead
Start opposite the valve and work your way around the rim, leaving the last section near the valve. Ensure both tyre beads fall into the rim’s central channel to seat properly.
Use your hands or gloves to pull the final tyre bead over the rim. Only use tyre levers if absolutely necessary, to avoid damaging the inner tube or rim.
Step 5 – Check and Inflate the Tyre
Check that the inner tube isn’t pinched and that both beads are evenly aligned. Gradually inflate the tyre to the recommended pressure for your bike or e-bike.
Roll the wheel on the ground to help the tyre bead settle correctly. Proper inflation and alignment improve safety, ride quality, and tyre longevity.
Tips for Tubeless Tyres
Proper tubeless tyre installation ensures safety, performance, and longer tyre life. Follow these tips for a smooth ride:
-
Seat the Tyre Bead – Push the tyre bead into the rim’s central channel to ensure an even fit and prevent air leaks.
-
Add Sealant – Pour tubeless sealant into the tyre before inflating to prevent slow leaks and protect against punctures.
-
Secure the Valve – Position the valve correctly and tighten the retaining nut to maintain proper tyre pressure.
-
Check Alignment – Spin the wheel to confirm the tyre beads are evenly seated and the tyre rotates smoothly.
-
Monitor Pressure – Inflate to the recommended pressure and check periodically for optimal grip and tyre life.
These tubeless tyre tips improve ride quality and performance for both regular bikes and e-bikes.
Common Mistakes to Avoid
Avoid these common errors to ensure safe and effective bike tyre changes:
-
Pinching the Inner Tube – Be careful not to trap the tube under the tyre bead, as this can cause punctures when inflating.
-
Incorrect Use of Tyre Levers – Using levers improperly can damage the rim, tube, or tyre. Always try using your hands first and use levers only when necessary.
-
Ignoring Damaged Rim or Rim Tape – Check the rim and rim tape for cuts or wear before installing a new tyre to prevent future punctures.
-
Installing the Tyre in the Wrong Direction – Many tyres have directional tread; mounting them incorrectly can reduce grip and braking efficiency.
Following these precautions helps maintain tyre performance, safety, and longevity, whether for regular bikes or e-bikes.
When to Replace a Bike Tyre
You should replace your bike tyre when the tread is worn down or the sidewalls are thinning, as this reduces grip and increases the risk of punctures. Frequent flats, visible cuts, cracks, or embedded debris are also signs that a tyre has reached the end of its life.
Replacing worn tyres promptly ensures safer rides, better braking, and smoother performance. This applies to all bikes, including e-bikes, where tyre condition is especially important due to higher speeds and torque.
How Long Do Road Bike Tyres Usually Last?
The typical road bike tyre lifespan varies between 2,000–5,000 miles (3,200–8,000 km), depending on riding conditions and frequency. Commuting on smooth roads may allow tyres to last longer, while aggressive riding or rough terrain reduces their lifespan.
Several factors affect how long bike tyres last, including terrain, rider weight, tyre pressure, and riding style. Maintaining proper inflation and avoiding debris can extend tyre life significantly.
Even if the tread looks fine, signs such as cracks, sidewall damage, or frequent flats indicate it’s time for a replacement. Knowing how long bike tyres last helps prevent accidents and ensures optimal performance on every ride.
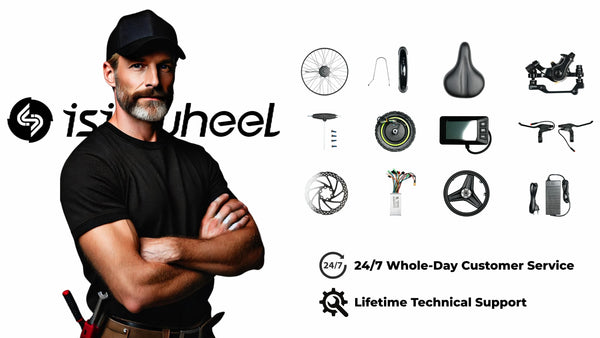
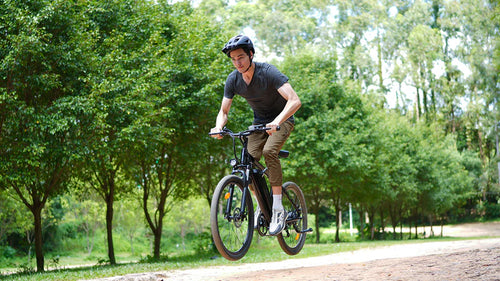
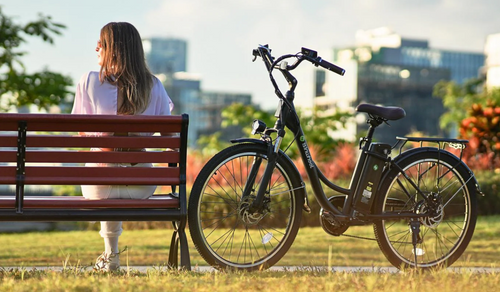
Best isinwheel E-Bikes for Easy Tyre Maintenance
Maintaining your bike tyres is easier with a reliable e-bike. isinwheel electric bikes offer durable tyres, robust rims, and easy-access components, making routine tyre checks and changes simple. Whether you’re commuting or riding off-road, these e-bikes provide smooth performance and safety, ensuring you can confidently handle tyre maintenance, including how to change a bike tyre.
|
Images |
 |
 |
 |
 |
 |
 |
|
Models |
||||||
|
Top Speed |
20 MPH |
20 MPH |
18.6 MPH |
21.7 MPH |
19 MPH |
20 MPH |
|
Peak Power |
500W |
500W |
500W |
500W |
500W |
750W |
|
Battery |
36V 7.8Ah |
36V 13Ah |
36V 7.8Ah |
36V 10.4Ah |
36V 10.4Ah |
36V 10.4Ah |
|
Max Range |
28 miles |
65 miles |
35 miles |
60 miles |
55 miles |
55 miles |
|
Speed (before unlock) |
10/15/25 km/h |
6/10/15/20/25 km/h |
10/15/25 km/h |
6/10/15/20/25 km/h |
6/10/15/25 km/h |
6/10/15/20/25 km/h |
|
Speed (after unlock) |
15/25/32 km/h |
10/15/20/25/32 km/h |
15/25/30 km/h |
6/10/15/20/35 km/h |
15/25/30 km/h |
10/15/20/25/32 km/h |
|
Brake System |
front and rear disc brakes |
mechanical brake |
disc brakes |
mechanical disc brakes |
dual disc brakes |
dual disc brakes |
|
Max Load |
120 kg |
120 kg |
120 kg |
150 kg |
120 kg |
120 kg |
|
Net Weight |
23.2 kg |
27 kg |
23.3 kg |
27kg |
26.5 kg |
28.4 kg |
|
Suspension |
Rear mid shock absorber |
Front suspension |
Adjustable front fork + comfort saddle |
Hydraulic fork |
Dual |
Aluminum front fork |
|
Max Climb |
20% |
37% |
25% |
20% |
20% |
20% |
|
Tire Size |
14×1.95" |
26×1.95" |
16×1.75" |
26×1.95" |
16×2.15" |
26×1.95" |
|
Tire Type |
Pneumatic |
Pneumatic |
Pneumatic |
Pneumatic |
Pneumatic |
Pneumatic |
|
IP Rating |
IPX4 |
IP65 |
IPX65 |
IPX5 |
IPX4 |
IPX4 |
|
Removable Battery |
No |
Yes |
No |
Yes |
Yes |
Yes |
|
Rider Height |
150–185 cm |
160–192 cm |
155–185 cm |
160–190 cm |
140–180 cm |
150–192 cm |
Conclusion
Knowing how to change a bike tyre is an essential skill for every cyclist. It not only helps you fix punctures quickly but also keeps your rides safe and efficient.
Regular tyre maintenance and proper installation prevent flats, improve grip, and extend tyre lifespan—whether you ride a road bike, mountain bike, or e-bike. By staying prepared and checking your tyres often, you can enjoy smoother, worry-free cycling every time.
FAQs
Can you replace a bike tyre yourself?
Yes, you can replace a bike tyre yourself with a few basic tools and the right technique. It’s a simple process once you understand the steps, making it easy to fix flats or upgrade tyres at home.
How do I take my tyre off my bike?
To remove a bike tyre, fully deflate it first. Push the tyre bead into the rim channel, use tyre levers to unhook one side, and pull the tyre and tube off the wheel carefully to avoid damage.
What tools do I need to replace a bike tyre?
You’ll need tyre levers, a bike pump, and optionally a patch kit or spare tube. For tubeless setups, sealant and a valve core tool may also be needed. Having these ready makes learning how to change a bike tyre quick and hassle-free.
How to remove a bike tyre without a tool?
To remove a bike tyre without a tool, fully deflate it, press the bead into the rim’s centre, and use your thumbs to lift it over the edge. Work around the rim until the tyre comes off. This simple method makes changing a bike tyre quick and tool-free.
The Latest Posts


Explore isinwheel products
City E Scooter | Off-Road Scooter
Fastest Scooter | Kids Scooters


Leave a comment