


How to Lower a Bike Seat: Step-by-Step Guide
Adjusting your bike seat height is essential for comfort, efficient pedaling, and preventing knee or back pain. If your seat is too high or low, it can affect your riding posture and overall performance.
If you’ve ever wondered how to lower a bike seat safely, this step-by-step guide will show you how to adjust it for a smooth, comfortable ride.
Step-by-Step Guide: How to Lower a Bike Seat
Lowering your e bike seat correctly is essential for comfort, efficiency, and injury prevention. Making a precise saddle adjustment ensures that your pedaling motion stays smooth and your joints remain protected during every ride.
1. Loosen the Seat Post
Confirm the clamp type: most city and commuter bikes use a quick-release lever; many road or mountain bikes use a bolted clamp. Knowing which one you have tells you whether you need tools.
If it’s a quick-release, open the lever and loosen the nut a half-turn if needed so the post can slide. If it’s a bolt, use the correct size Allen key (usually 4–6 mm) or wrench and turn counterclockwise until the post moves freely.
Keep the bike upright or secure it in a stand, and hold the saddle while loosening to prevent the post from dropping suddenly. Never force a seized clamp—apply penetrating oil and allow it to soak if the post won’t budge.
2. Slide the Seat to the Desired Height
Lower the saddle in small increments—start with 1–2 cm at a time. Your target: a slight knee bend of ~25° at the bottom of the pedal stroke (when the crank is 6 o’clock). This is a reliable guideline for comfort and power transfer.
If you want a repeatable measurement, measure your pubic bone height, then subtract 10–10.5 cm to estimate saddle height from the bottom bracket center to the top of the saddle. Use this only as a starting point; fine-tune on the bike.
After moving the post, check the minimum insertion mark on the seat post—never position it above that line. Doing so risks frame damage or sudden post failure.
3. Align the Saddle and Check Fore-Aft Position
Rotate the saddle so it is pointing straight ahead; then check the fore-aft position. Put one pedal at the 3 o’clock position and drop a vertical line from the front of your knee—this line should intersect the pedal spindle. That alignment prevents forward/back knee strain.
If the knee falls too far forward, slide the saddle rearward a little; if it’s too far back, move the saddle forward. Make adjustments in small steps (5–10 mm), then recheck while seated and pedaling slowly on a trainer or while walking the bike.
Also confirm the saddle is centered on the rails and not skewed left/right—uneven placement causes hip or sit-bone pressure over time.
4. Secure the Seat Firmly
Tighten the quick-release lever by closing it firmly—there should be firm resistance at about halfway through the closing motion. For bolted clamps, tighten the bolt to the manufacturer’s recommended torque (often 5–8 Nm for alloy parts). Use a torque wrench if available.
Avoid overtightening—especially on carbon seat posts or frames where excessive torque can crack components. If you’re unsure, consult the bike or seat post manual for torque specs or visit a bike shop for a safe torque check.
After tightening, grab the saddle and attempt to rotate and pull it—there should be no movement. Test for any creaks or unusual play by applying body weight while the bike is supported.
5. Test the Adjustment with a Short Ride
Do a short ride (5–10 minutes) on flat, smooth pavement. Focus on knee bend, hip stability, and whether pedaling feels smooth. If you feel front-of-knee pain, the saddle may be too low; back-of-knee pain usually means it’s too high.
Test standing and seated pedaling, and use your typical shoes or clipless pedals because footwear affects leg extension. If you use toe clips or cleats, test with them engaged—these change biomechanics slightly.
Make micro-adjustments as needed: small changes often solve discomfort. Re-secure and retest until pedaling feels efficient and joints feel relaxed.
6. Fine-Tune Angle and Position
Set the saddle angle level as a baseline—most riders are best with a near-horizontal saddle. If you feel pressure in the perineum, tilt the nose down by no more than 2–3 degrees; if weight slides forward, tilt slightly up. Make tiny angle changes and test each on a short ride.
Reconfirm fore-aft alignment and height after angle tweaks; changes to the angle can alter pressure points and perceived leg extension. Track how you feel over several rides—fatigue or numbness after longer rides indicates more fine-tuning is required.
If you ride frequently or for long durations, consider a full professional proper bike fit to optimize saddle height, reach, and overall bike ergonomics for your body and riding goals.
Why Proper Bike Seat Height Matters
Having your bike seat at the correct height is essential for both comfort and performance. When your seat is properly adjusted, pedaling becomes smoother and more efficient, which supports proper bike fit and reduces fatigue on longer rides.
A seat that’s too high or too low can place unnecessary strain on your knees, hips, and lower back—one of the most common causes of cycling knee pain seat height issues. Ensuring the correct height supports natural movement and better bike ergonomics, helping you ride more comfortably and safely.
Fine-Tuning for Comfort
After lowering your bike seat, fine-tuning the seat position and angle is essential for optimal comfort, efficient pedaling, and injury prevention. Even small adjustments can significantly impact your riding experience, especially during long rides.
Start with the fore-aft position of your saddle. Place a pedal at the 3 o’clock position and drop a vertical line from the front of your knee. The line should intersect the pedal spindle. This ensures proper knee tracking, balanced weight distribution, and reduced stress on your knees and hips. Slide the seat slightly forward or backward until this alignment feels natural during pedaling.
Next, check the seat angle. The saddle should generally be level with the ground to distribute your weight evenly across the sit bones. A subtle tilt can improve comfort: women may benefit from a slight downward tilt, while men may prefer a slight upward tilt. Avoid making large angle changes before confirming that the height and fore-aft position are correct, as improper angles can cause pressure points, numbness, or inefficient pedaling.
By fine-tuning seat height, fore-aft alignment, and seat angle together, you create the most comfortable and efficient riding position. Proper adjustments reduce the risk of knee, hip, and lower back pain while improving overall cycling performance.
When to Visit a Bike Shop
Even after lowering and fine-tuning your bike seat, there are situations where professional assistance is recommended. If you experience persistent discomfort or pain despite correctly adjusting your seat height, angle, and fore-aft position, a bike shop can help identify subtle issues that may be difficult to spot at home.
Riders with high-performance or carbon fiber bikes should also consider professional help. These bikes often require torque-specific tightening to avoid damage, and incorrect handling can compromise safety or void warranties. A trained technician can ensure that the seat post and saddle are secured correctly without risk.
Additionally, visiting a bike shop is beneficial for professional bike fitting. Experts can measure your body, riding style, and flexibility to optimize seat height, angle, and fore-aft position. A professional fit improves comfort, efficiency, and reduces the risk of long-term injuries, especially for serious riders or those spending extended hours on the bike.
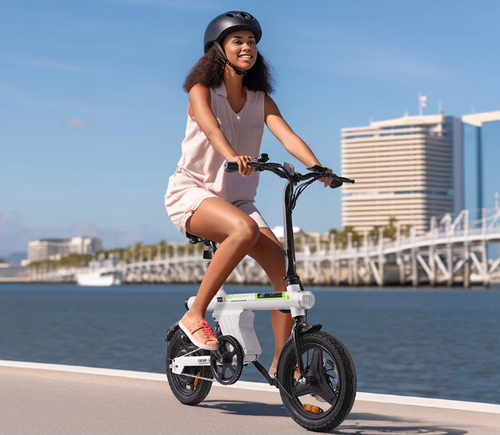
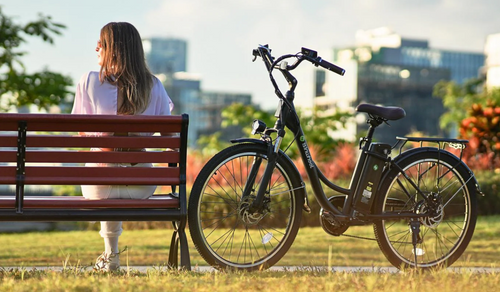
Explore isinwheel Electric Bikes for Comfort and Performance
If you’re upgrading your ride, isinwheel offers high-quality electric bikes perfect for commuting, casual riding, or weekend adventures. Their lineup includes models suited for those seeking compact electric city bikes, hybrid electric bikes, or even best e-bikes for beginners. Some models are also excellent alternatives to foldable e-bikes, offering convenience and comfort.
Below is a comparison of the latest isinwheel electric bike models to help you choose the one that fits your needs:
|
Images |
 |
 |
 |
 |
 |
 |
|
Models |
||||||
|
Top Speed |
20 MPH |
20 MPH |
18.6 MPH |
21.7 MPH |
19 MPH |
20 MPH |
|
Peak Power |
500W |
500W |
500W |
500W |
500W |
750W |
|
Battery |
36V 7.8Ah |
36V 13Ah |
36V 7.8Ah |
36V 10.4Ah |
36V 10.4Ah |
36V 10.4Ah |
|
Max Range |
28 miles |
65 miles |
35 miles |
60 miles |
55 miles |
55 miles |
|
Speed (before unlock) |
10/15/25 km/h |
6/10/15/20/25 km/h |
10/15/25 km/h |
6/10/15/20/25 km/h |
6/10/15/25 km/h |
6/10/15/20/25 km/h |
|
Speed (after unlock) |
15/25/32 km/h |
10/15/20/25/32 km/h |
15/25/30 km/h |
6/10/15/20/35 km/h |
15/25/30 km/h |
10/15/20/25/32 km/h |
|
Brake System |
front and rear disc brakes |
mechanical brake |
disc brakes |
mechanical disc brakes |
dual disc brakes |
dual disc brakes |
|
Max Load |
120 kg |
120 kg |
120 kg |
150 kg |
120 kg |
120 kg |
|
Net Weight |
23.2 kg |
27 kg |
23.3 kg |
27kg |
26.5 kg |
28.4 kg |
|
Suspension |
Rear mid shock absorber |
Front suspension |
Adjustable front fork + comfort saddle |
Hydraulic fork |
Dual |
Aluminum front fork |
|
Max Climb |
20% |
37% |
25% |
20% |
20% |
20% |
|
Tire Size |
14×1.95" |
26×1.95" |
16×1.75" |
26×1.95" |
16×2.15" |
26×1.95" |
|
Tire Type |
Pneumatic |
Pneumatic |
Pneumatic |
Pneumatic |
Pneumatic |
Pneumatic |
|
IP Rating |
IPX4 |
IP65 |
IPX65 |
IPX5 |
IPX4 |
IPX4 |
|
Removable Battery |
No |
Yes |
No |
Yes |
Yes |
Yes |
|
Rider Height |
150–185 cm |
160–192 cm |
155–185 cm |
160–190 cm |
140–180 cm |
150–192 cm |
Conclusion
Lowering your bike seat correctly is one of the simplest ways to improve comfort, efficiency, and overall riding enjoyment. By fine-tuning your saddle height and position, you reduce strain and achieve a smoother, safer ride. If you're ready for a more comfortable cycling experience, adjust your seat today—or explore electric bikes for commuting with isinwheel for an even smoother ride.
FAQs
How do I lower the seat height on a bike?
To lower your bike seat, loosen the seat post clamp using a quick-release lever or an Allen key. Slide the saddle down to your preferred height, then retighten the clamp securely. Aim for a slight bend in your knee at the bottom of the pedal stroke for optimal comfort and efficiency.
What if my bike seat is too high?
A bike seat that’s too high can cause knee pain, hip rocking, and reduced control. If this happens, lower the saddle in small increments until your legs extend comfortably without overreaching. Proper seat height improves pedaling power and overall riding comfort.
How do I lower a bike seat without an Allen key?
If your bike uses a quick-release clamp, you can adjust the seat height by simply opening the lever by hand. If it requires an Allen key and you don’t have one, it’s best to get the correct tool rather than force the adjustment, which can damage the clamp or seat post.
Can I reduce bike seat height?
Yes, you can reduce bike seat height by lowering the seat post or having a professional shorten an overly long post if necessary. Always ensure the post remains above the “minimum insertion” line to keep your bike safe and structurally sound.
The Latest Posts


Explore isinwheel products
City E Scooter | Off-Road Scooter
Fastest Scooter | Kids Scooters


Leave a comment